White-Label API Custom Domain Setup Guide
Welcome to the step-by-step guide for setting up your own custom domain with our payment gateway API. This setup allows you to replace api.shieldclimb.com and payment.shieldclimb.com with your branded domain—giving your sub-merchants a fully white-labeled experience.
Step 1: Set Up Cloudflare (if not already done)
- Create a Cloudflare account – The free plan is sufficient.
- Add your domain to Cloudflare and follow the instructions to update your nameservers at your domain registrar. Each account provides unique nameservers.
- Once propagated, your domain will be actively managed by Cloudflare.
Tip: If your domain is already on Cloudflare, you can start from Step 2 below.
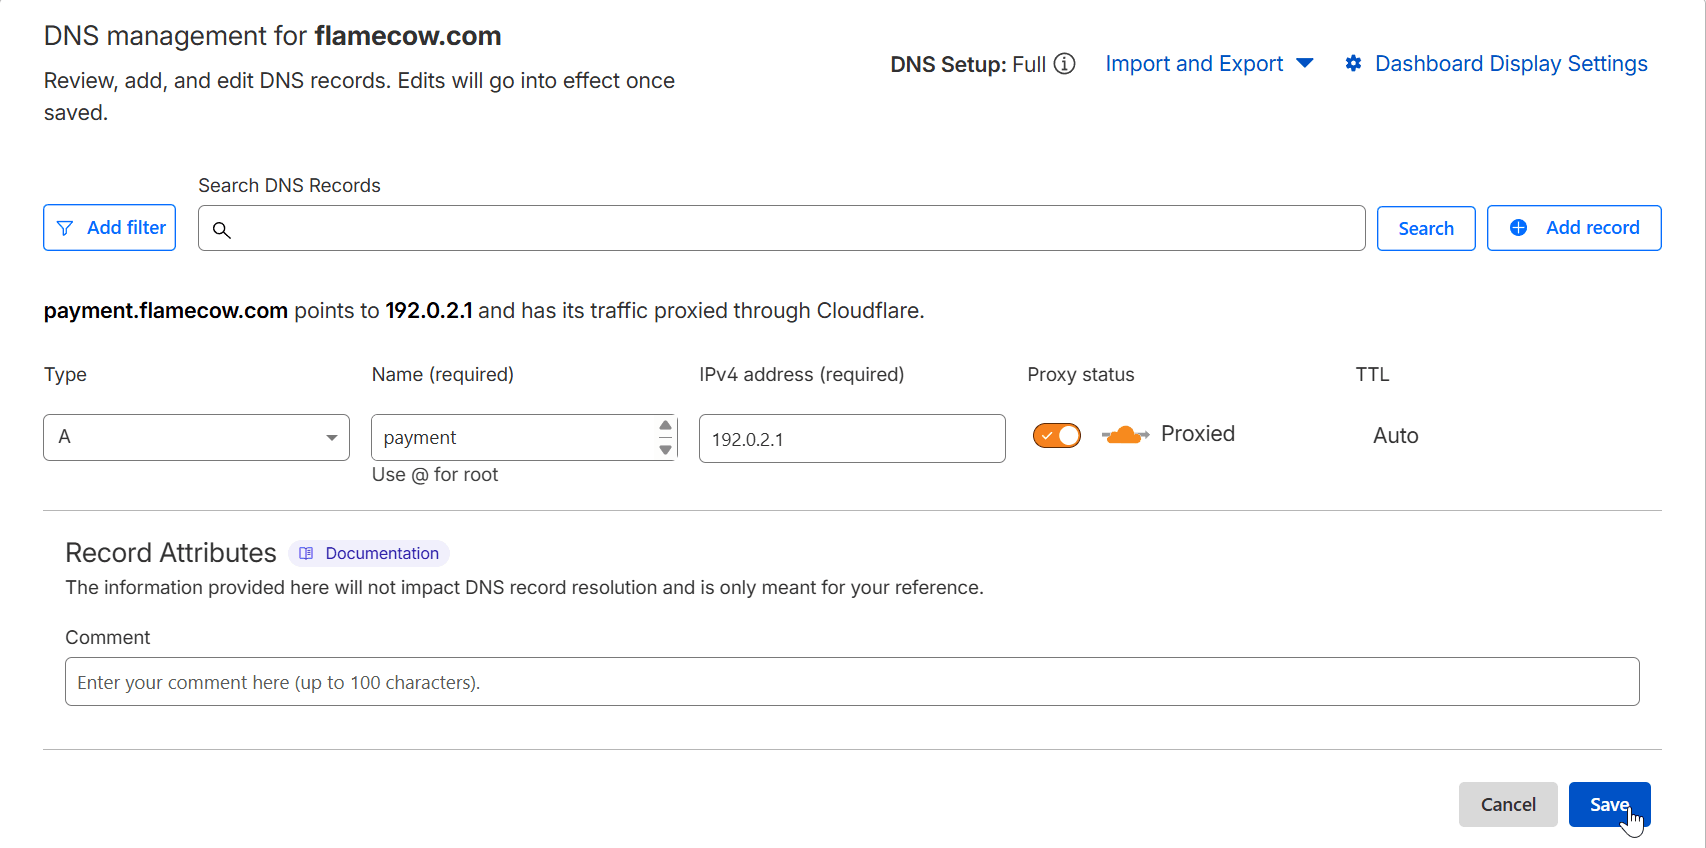
Step 2: Add DNS Records for Your API Subdomains
- Go to Cloudflare → DNS for your domain.
- Click the “Add Record” button.
- Configure your subdomain records as follows (repeat for each subdomain you will connect to your API, e.g.,
api.yourdomain.comandpayment.yourdomain.com):- Type: A
- Name: Enter your subdomain (
apiorpayment) - IPv4 Address:
192.0.2.1(safe placeholder — traffic never actually goes here) - Proxy status: 🟠 Orange Cloud ON (required for Workers to handle the traffic)
- Click Save after adding each record.
Note: Using
192.0.2.1is safe because Cloudflare proxies all traffic through the Worker. The IP is only a placeholder, so no data is actually sent to it. Just copy it exactly as shown.

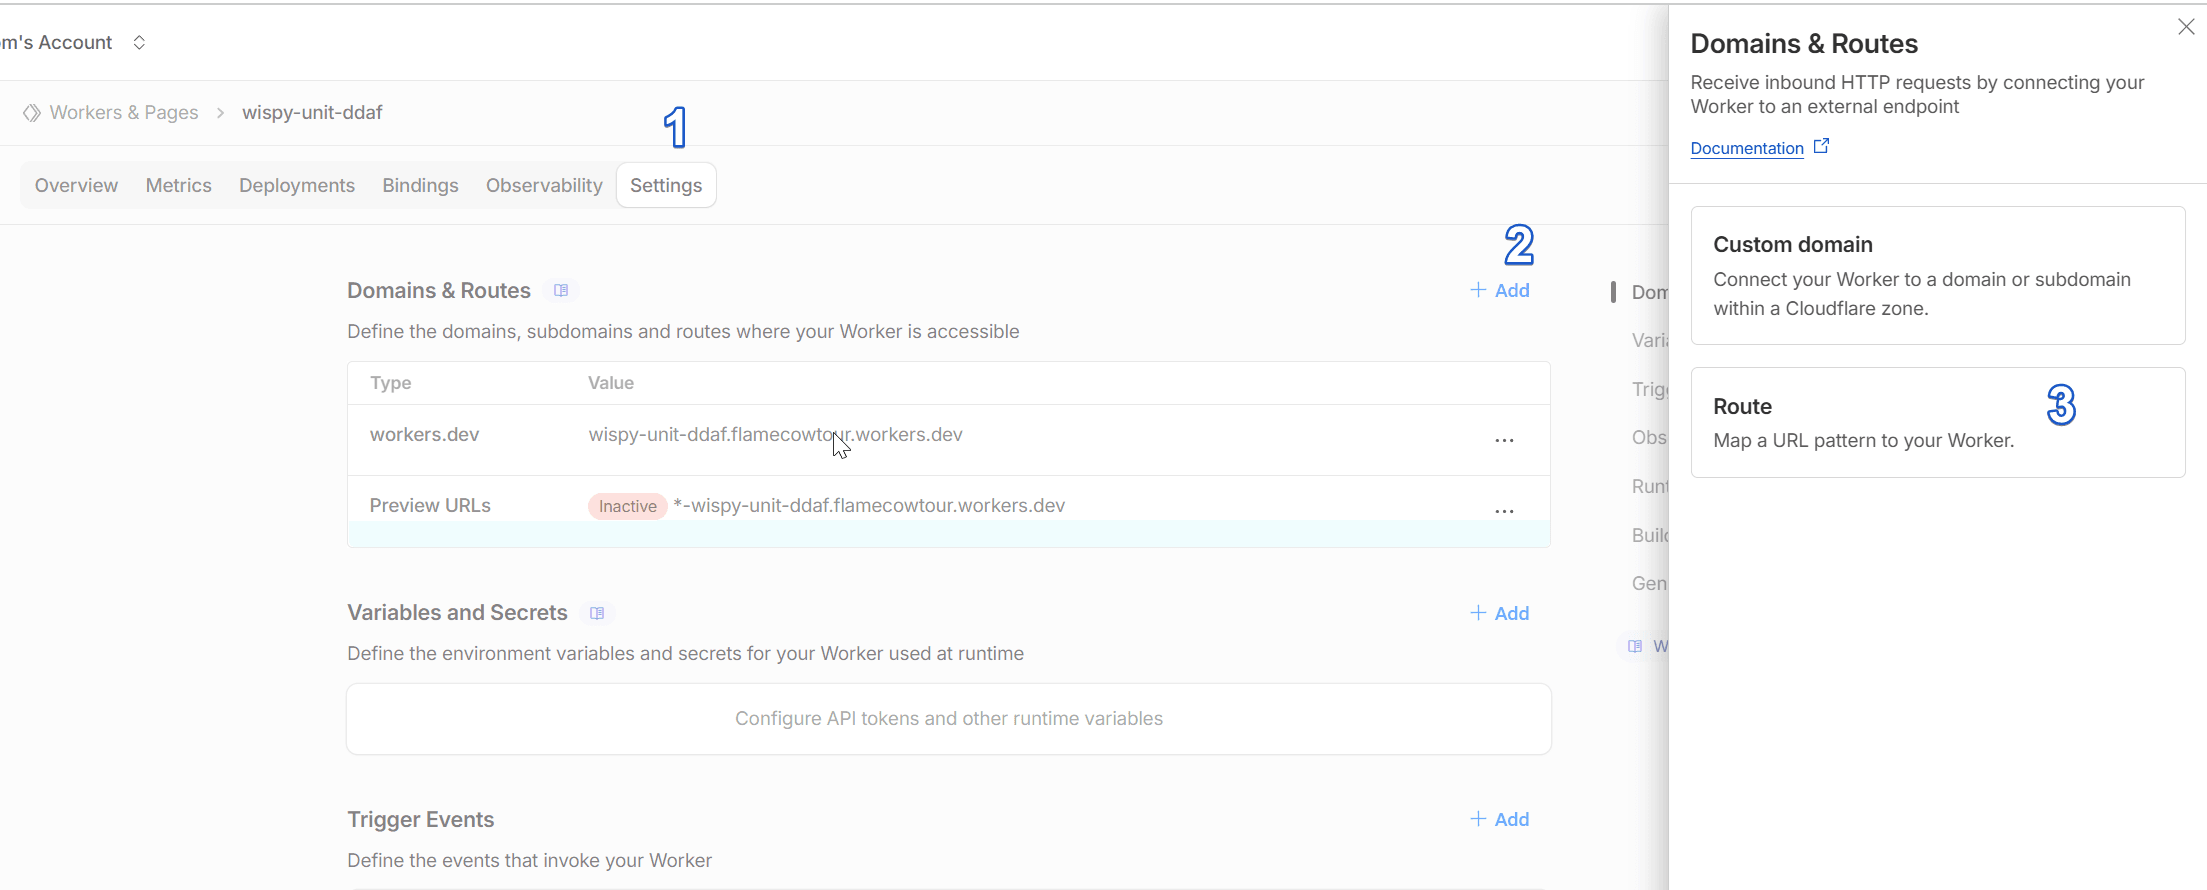
Step 3: Create a Cloudflare Worker
- Navigate to the Workers Routes tab in your Cloudflare sidebar, then click on Manage Workers button.
- Click Create Application, choose “Start with Hello World”, click Deploy button to generate a new worker.
- Click Edit Code, in the editor, choose one of the following and paste it:
- hidden-affiliate-worker.js (for affiliate domains)
- standard-domain-worker.js (for non-affiliate domains)
Important Notes:
- Please check the latest version on GitHub regularly for updates. Using outdated code may cause errors or unexpected behavior.
- Replace the wallet address with your own USDC (Polygon) wallet to receive affiliate commissions.
- Ensure that
sub_affiliate_fee + merchant_fee = 0.985(platform fee is 1.5%). Incorrect totals will cause request failures. - Set a custom error page.
- Do not modify the API domain or any other part of the code. Only update the values highlighted in the blue box, as shown below.
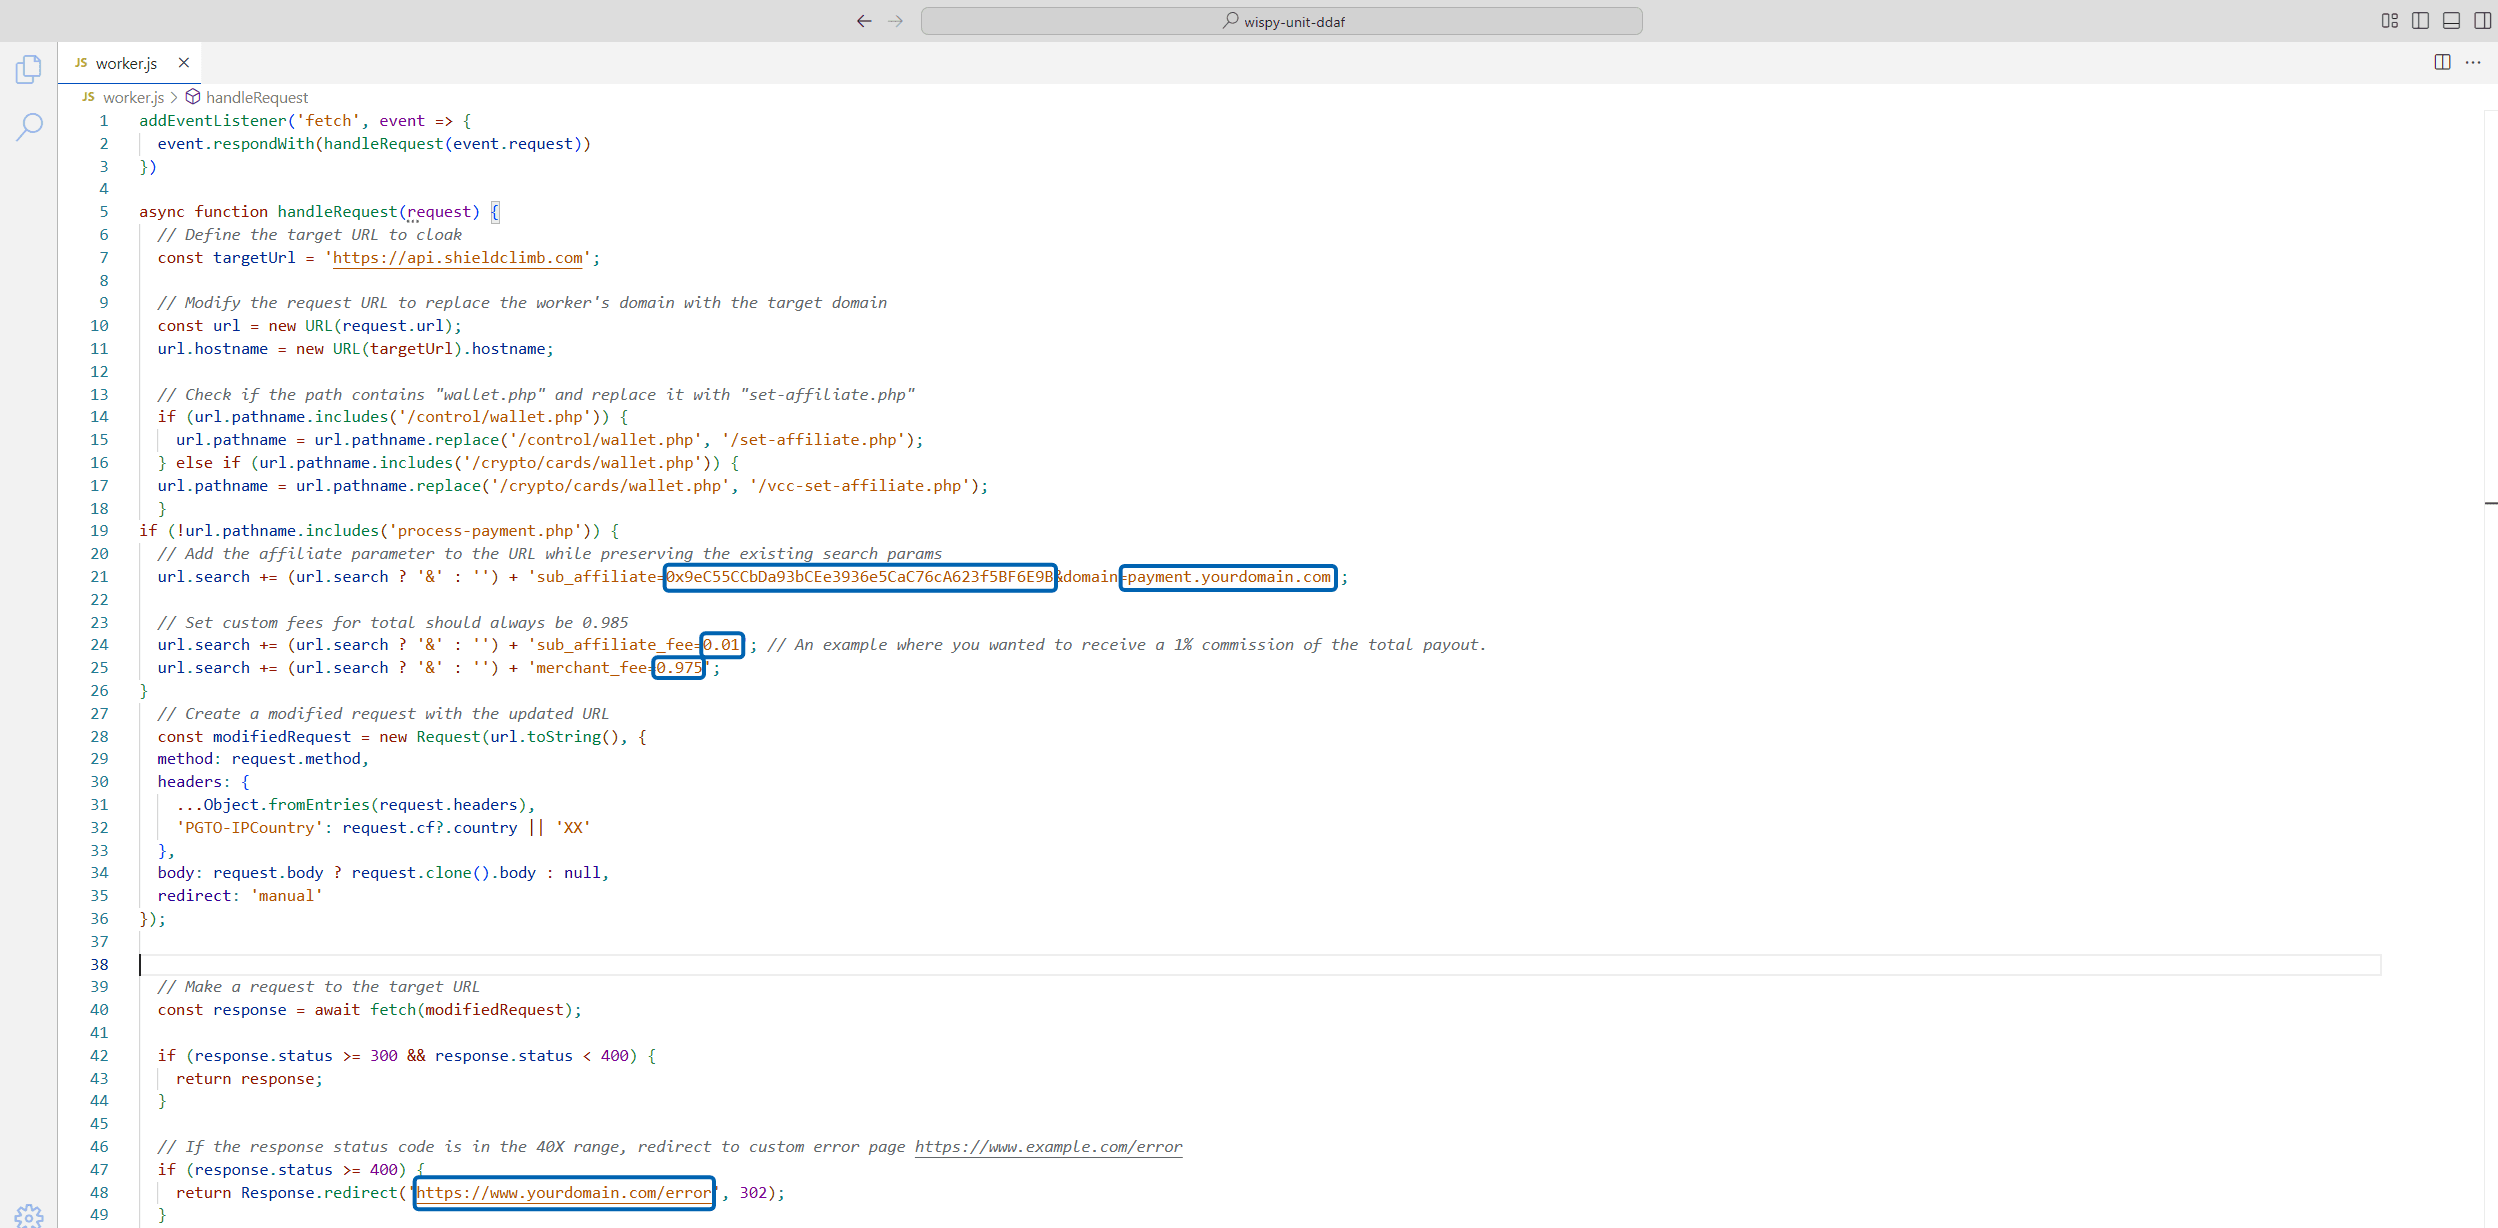
- Deploy the worker. The free plan supports 100,000 requests/day per custom domain.
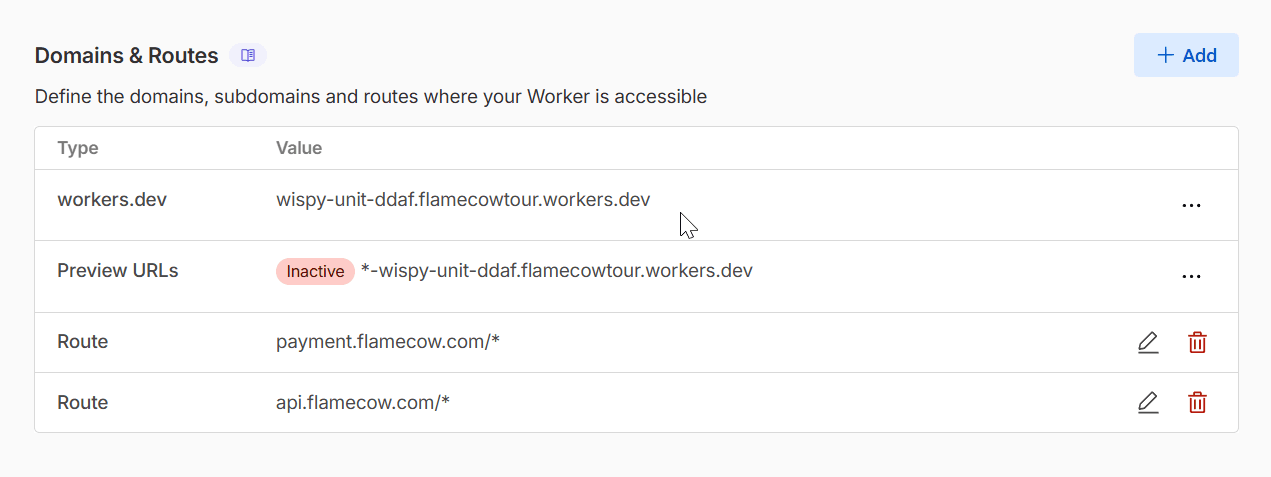
Step 4: Route Your Domain to the Worker
- In the worker setting tab, click + Add at the Domain & Routes section, then choose Route.
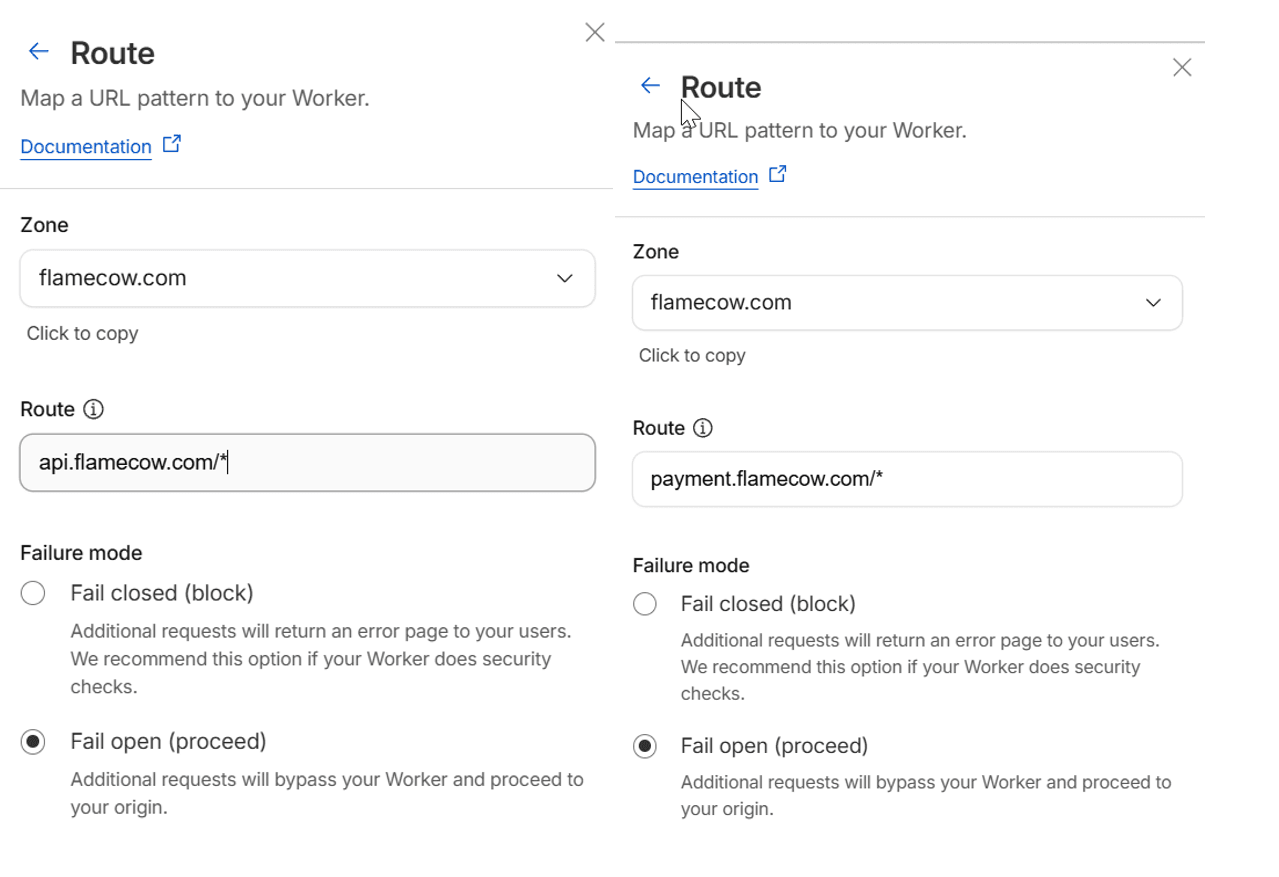
- Add a route for each subdomain using the
*wildcard for global coverage:
api.yourdomain.com/*
payment.yourdomain.com/*
This ensures all paths under the subdomain automatically route through your worker. After setup, your domain behaves like
api.shieldclimb.com.
Step 5: Enable Affiliate Commissions
- By embedding your wallet in hidden-affiliate-worker.js, every request through your custom domain automatically includes your affiliate wallet.
- This ensures you earn commissions on all transactions without manual insertion in plugins.
- Protects against sub-merchants bypassing your wallet.
API Documentation & Testing
Once your custom domain is set up:
- Access full API references, endpoints, request/response examples, and authentication at: developers.shieldclimb.com
- Test your API using your new custom domain (e.g.,
api.yourdomain.comandpayment.yourdomain.com) to ensure requests route correctly and your affiliate wallet is included. - Examples covers creating payment links, handling instant crypto payouts, receiving payment notifications via callback, and converting currencies
White-Label Plugins and Modules
All plugins and modules are open-source and can be re-branded:
- Replace all instances of
api.shieldclimb.comandpayment.shieldclimb.comin plugin code with your custom domain. - When paired with your custom domain and hidden affiliate worker, the wallet parameter is automatically added to each request.
- You can rebrand and redistribute plugins or modules while keeping affiliate earnings secure.
Access all code and examples on our GitHub repository.
Support
For assistance with:
- Custom domain setup
- Cloudflare Worker deployment
- Affiliate wallet integration
- Plugin rebranding
…contact our support team anytime.